

If you love seafood with a crispy coating and a hint of tropical sweetness, this coconut shrimp recipe is a must-try. Juicy shrimp are coated in seasoned flour, dipped in egg, and covered with a crunchy mixture of shredded coconut and breadcrumbs. Each shrimp turns beautifully golden on the outside while staying tender and flavorful inside.
This homemade coconut shrimp is perfect for family dinners, weekend snacks, parties, or a special appetizer. It is easy to prepare with simple ingredients and tastes delicious when served with sweet chili sauce, honey mustard, or a creamy dipping sauce.
The best part is that you do not need to visit a restaurant to enjoy crispy coconut shrimp. With a few easy steps and the right frying temperature, you can make this crowd-pleasing seafood dish right in your own kitchen.
Recipe Overview
- Recipe Name: Coconut Shrimp
- Cuisine: American, Caribbean-inspired
- Course: Appetizer, Snack, Main Course
- Preparation Time: 15 minutes
- Cooking Time: 15 minutes
- Total Time: 30 minutes
- Servings: 4 people
- Yield: Approximately 20 to 24 shrimp
- Cooking Method: Pan-frying or shallow-frying
- Difficulty Level: Easy
Why You’ll Love This Coconut Shrimp Recipe
This coconut shrimp recipe combines tender shrimp with a crispy, golden coating and a lightly sweet coconut flavor. It uses everyday ingredients, comes together in about 30 minutes, and pairs wonderfully with a variety of dipping sauces. Whether you are serving it as a party appetizer or a seafood dinner, it is a delicious way to bring restaurant-style flavor to your table.
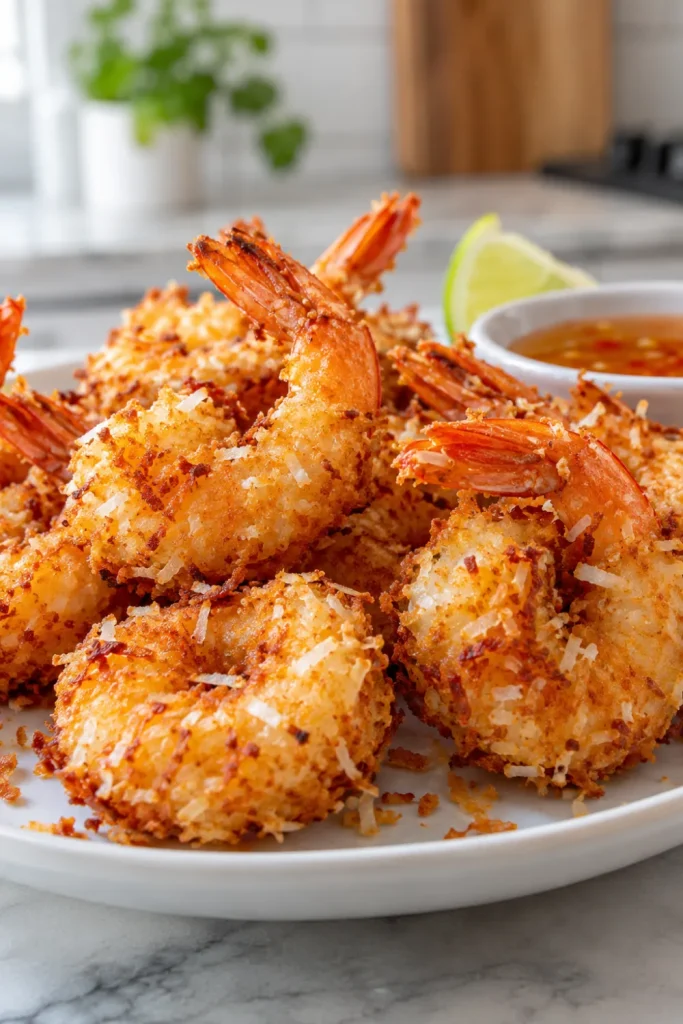
Ingredients for Coconut Shrimp
The secret to delicious coconut shrimp is balancing the sweetness of shredded coconut with the savory flavor of seasoned breadcrumbs. Fresh or properly thawed frozen shrimp work well for this recipe.
Main Ingredients
- 1 pound (450 g) large shrimp: Peeled and deveined, with tails on or off according to your preference.
- 1 cup shredded coconut: Use unsweetened shredded coconut for a balanced flavor or sweetened coconut for a sweeter coating.
- 1 cup panko breadcrumbs: These help create a light, crunchy crust. Regular breadcrumbs can also be used.
- 1/2 cup all-purpose flour: Helps the egg mixture adhere to the shrimp.
- 2 large eggs: Beaten to create the binding layer.
- 1/2 teaspoon salt: Enhances the flavor of the shrimp.
- 1/2 teaspoon paprika: Adds mild warmth and a lovely golden color.
- 1/4 teaspoon black pepper: Provides a little seasoning.
- 1/2 teaspoon garlic powder: Adds a subtle savory flavor.
- 1 to 2 cups neutral cooking oil: Use enough for shallow-frying, depending on the size of your pan.
Optional Ingredients for Serving
- Sweet chili sauce
- Honey mustard sauce
- Garlic mayonnaise
- Fresh lemon or lime wedges
- Chopped fresh parsley or cilantro
Equipment Needed
You will need the following kitchen equipment to prepare coconut shrimp:
- Three shallow bowls: For the flour, beaten eggs, and coconut breadcrumb mixture.
- Large frying pan or skillet: For frying the shrimp evenly.
- Tongs: To turn the shrimp safely during cooking.
- Measuring cups and spoons: To measure the ingredients accurately.
- Paper towels: To absorb excess oil after frying.
- Wire cooling rack: Helps keep the shrimp crispy after cooking.
- Baking sheet or large plate: For arranging the coated shrimp before frying.
- Instant-read food thermometer: Optional, but useful for checking that the shrimp are safely cooked.
How to Make Coconut Shrimp
Follow these simple steps to make crispy coconut shrimp with a flavorful coating and juicy center.
Step 1: Prepare the Shrimp
If you are using frozen shrimp, thaw them completely according to the package instructions. Peel and devein the shrimp if needed, leaving the tails on if you prefer an attractive presentation.
Pat the shrimp thoroughly dry with paper towels. Removing excess moisture helps the coating stick better and prevents water from splattering in the hot oil.
Season the shrimp lightly with salt, black pepper, and garlic powder. Set aside while you prepare the coating ingredients.
Step 2: Set Up the Breading Station
Arrange three shallow bowls on your work surface.
- In the first bowl, add the all-purpose flour.
- In the second bowl, whisk the eggs until the yolks and whites are fully combined.
- In the third bowl, mix the shredded coconut, panko breadcrumbs, and paprika.
Keep the bowls close together to make the breading process easier. Using separate bowls allows you to coat each shrimp evenly without making a mess.
Step 3: Coat the Shrimp
Take one shrimp and dredge it in the flour, making sure all sides are lightly covered. Shake off any excess flour.
Next, dip the shrimp into the beaten eggs, allowing the excess egg to drip back into the bowl.
Finally, press the shrimp into the coconut and breadcrumb mixture. Turn it over and gently press the coating onto all sides.
Place the coated shrimp on a baking sheet or large plate. Repeat the process with the remaining shrimp.
For an extra-crispy crust, gently press the coconut mixture onto the shrimp rather than simply rolling it through the bowl.
Step 4: Heat the Oil
Pour the cooking oil into a large, heavy-bottomed skillet to a depth suitable for shallow-frying. Heat it over medium to medium-high heat until it reaches approximately 350°F (175°C).
If you do not have a thermometer, test the oil with a small pinch of breadcrumbs. They should sizzle immediately without burning too quickly.
Avoid overheating the oil because shredded coconut can brown rapidly. If the oil is too cool, the coating may absorb excess oil and become greasy.
Step 5: Fry the Coconut Shrimp
Carefully place a small batch of coated shrimp into the hot oil. Do not overcrowd the pan, as adding too many shrimp at once can lower the oil temperature.
Fry for approximately 2 to 3 minutes per side, depending on the size of the shrimp, until the coating is golden brown and crisp.
The shrimp should turn opaque and reach an internal temperature of 145°F (63°C) at the thickest part.
Use tongs to transfer the cooked shrimp to a wire rack or a plate lined with paper towels. Allow excess oil to drain before serving.
Repeat with the remaining shrimp, adjusting the heat as needed to keep the oil at a steady temperature.
Tasty and Delicious Recipes: Air Fryer Cookbook: 600 Effortless Air Fryer Recipes for Beginners and Advanced Users
Step 6: Serve and Enjoy
Transfer the crispy coconut shrimp to a serving platter. Garnish with lemon wedges and fresh herbs if desired.
Serve immediately with sweet chili sauce, honey mustard, or your favorite dipping sauce. Coconut shrimp tastes best while the coating is still hot and crunchy.
Tips for Making the Best Coconut Shrimp
A few simple techniques can help you achieve a crispy coating and perfectly cooked shrimp every time.
1. Dry the Shrimp Thoroughly
Moisture can prevent the flour and coconut coating from adhering properly. Patting the shrimp dry before breading makes a noticeable difference.
2. Use Panko Breadcrumbs
Panko breadcrumbs create a lighter, crispier texture than many regular breadcrumbs. Mixing them with shredded coconut gives the shrimp a satisfying crunch.
3. Choose the Right Coconut
Unsweetened shredded coconut is a good choice if you prefer a savory shrimp appetizer. Sweetened coconut creates a sweeter, more tropical flavor, but it may brown more quickly.
4. Avoid Overcrowding the Pan
Fry the shrimp in small batches so the oil stays hot and the coating becomes crisp rather than soggy.
5. Do Not Overcook the Shrimp
Shrimp cook quickly. Remove them once they are opaque and have reached 145°F (63°C). Overcooking can make them tough and rubbery.
6. Keep Cooked Shrimp Crispy
Place cooked shrimp on a wire rack instead of stacking them on top of one another. This allows steam to escape and helps preserve the crunchy coating.
What to Serve with Coconut Shrimp
Coconut shrimp pairs well with sauces, fresh salads, and simple side dishes. Here are some delicious serving ideas.
- Sweet chili sauce: A sweet and mildly spicy option that complements the coconut coating.
- Honey mustard: Adds a creamy, tangy flavor.
- Garlic mayonnaise: A rich dipping sauce for seafood lovers.
- Fresh green salad: Balances the crispy shrimp with a refreshing side.
- Coconut rice: Enhances the tropical flavors of the dish.
- French fries or roasted potatoes: Makes the shrimp more filling for a casual dinner.
- Grilled vegetables: Adds color, texture, and freshness to the plate.
- Lime wedges: A squeeze of citrus brightens the flavor of the shrimp.
For a party, arrange the shrimp on a platter with two or three dipping sauces. For a complete meal, serve them with rice, vegetables, and a fresh salad.
Variations of Coconut Shrimp
You can adapt this recipe to suit your taste, available ingredients, or preferred cooking method.
Air Fryer Coconut Shrimp
Preheat your air fryer to 400°F (200°C). Arrange the breaded shrimp in a single layer and lightly spray the coating with cooking oil.
Air-fry for approximately 8 to 10 minutes, turning halfway through, until the coating is golden and the shrimp reach 145°F (63°C). Cooking time may vary depending on shrimp size and your air fryer.
Avoid overcrowding the basket to help the coating crisp evenly.
Baked Coconut Shrimp
Preheat the oven to 425°F (220°C). Arrange the coated shrimp on a parchment-lined baking sheet and lightly spray with oil.
Bake for approximately 10 to 14 minutes, turning halfway through, until the shrimp are crisp, golden, and cooked through. Check early because smaller shrimp may cook faster.
Baked coconut shrimp may not be quite as crunchy as the fried version, but it is a convenient alternative.
Spicy Coconut Shrimp
For a little heat, add 1/4 teaspoon of cayenne pepper or a pinch of chili powder to the coconut breadcrumb mixture. You can also serve the shrimp with a spicy dipping sauce.
Gluten-Free Coconut Shrimp
Replace the all-purpose flour with a gluten-free flour blend and use certified gluten-free breadcrumbs. Check the labels of all packaged ingredients to ensure they meet your dietary requirements.
How to Store and Reheat Coconut Shrimp
Storing Leftovers
Allow the shrimp to cool slightly, then transfer them to an airtight container and refrigerate within two hours of cooking. Store in the refrigerator for up to 3 to 4 days.
For the best texture, keep the dipping sauce in a separate container.
Reheating Coconut Shrimp
The oven or air fryer is the best choice for restoring some of the original crispness.
- Air fryer: Reheat at 350°F (175°C) for about 3 to 5 minutes.
- Oven: Reheat at 375°F (190°C) for about 5 to 8 minutes.
Check that the shrimp are heated through. Avoid reheating them for too long, as shrimp can become rubbery.
Can You Freeze Coconut Shrimp?
Yes. For the best results, freeze the breaded shrimp before frying in a single layer on a baking sheet, then transfer them to a freezer-safe container once solid. Cook from frozen, adding extra cooking time as needed and checking for doneness.
You can also freeze cooked coconut shrimp, although the coating may lose some of its crispness. Refrigerate leftovers promptly and avoid leaving cooked seafood at room temperature for extended periods.